If I had to guess, I would say that you probably have a Pinterest board of DIY projects that you keep pinning cutesy, fun ideas on that you never seem to get to! Trust me...this was me up until recently! I had hundreds of pins saved to various boards of projects that I REALLY wanted to make, but I always talked myself out of it. Maybe it was "Oh, I don't have time to make that and that looks like a way too much work." or "Wow! They are craftier than I will ever be. My project will end up on the 'Pinterest Fails' website if I tried to make that! Not happening."
But, now I don't feel that way anymore, and you don't have to either! Yes, you CAN make these DIYs that are so much fun and add so much character to your home or classroom! :) Yes, I have my husband on board, which does help, but you are totally able to do these on your own! I have made it super simple, step-by-step, so that you can easily break projects down into manageable parts...or as my teacher friends may know it...I have "chunked the information into digestible bites." We all know it can be an effective strategy, right?! I will also share with you the items I find on a budget, because we ALL know that's important.
So, let's get started!
Today's project is a Pinterest-inspired DIY TV Stand.
Our old TV stand was a very tiny, black TV stand that was made from cheap wood and thin laminate. We bought it our sophomore year of college...very trendy, right?! Not anymore. It did us well in college, but now we are more established in our adult life and thought we needed a bit of an upgrade, as you can see!
This is our old TV stand:

Here is what our FINAL PRODUCT looks like! :)

- Old Dresser (We found one at a thrift store!)
- Screwdriver
- 1 3/4 inch Hole Saw
- Drill
- Mouse Sander with 120 Grit sandpaper
- 220 Grit sandpaper sheet
- Tack Cloth
- Foam Roller
- Foam Brush
- 2 Paint Trays (Primer/Paint)
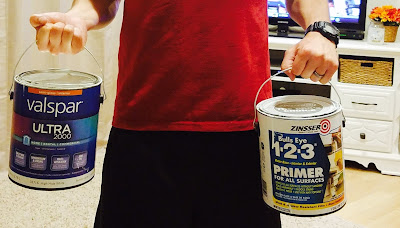
- Primer: Zinsser Bull's Eye 1.2.3 Primer - All Surfaces
- Paint: Your Choice of Color - Semi-Gloss Interior
- Optional: Baskets and Updated Handles
 We found this adorable antique dresser/mirror set (mirror not pictured) at a local thrift store. We were looking for something with a little bit of "character" to it - not plain. This was perfect! As of right now, we have set the mirror aside and plan to use it elsewhere in the house on its own - probably in the guest room! The even MORE perfect thing is that this was listed for $150 as it is solid oak, but we got it 50% off, so we only paid $75! With this price for a piece of this quality, we knew this was a steal! You never know what you'll find!
We played around with different drawer layouts. Choose what's best for YOU! :)
 Once we decided which drawers we wanted removed, my husband unscrewed the grooves/guiders that the drawers slide in and out on. He drilled two holes for the wires to go through. He used a 1 3/4 inch Hole Saw from Lowe's. We purchased a Value 6-Pack, but I honestly can't remember the price! It WAS a good deal! :) This created a nice, perfectly round hole. You can't see the holes when your devices are in place (Cable box, Xbox, Playstation, etc).
Next, we sanded the dresser completely. We used a mouse sander similar to this one for large surface areas. This one is $29.98 at Lowe's. The sand paper is $11.98 for 12 sheets of various sizes. For this project, we used 120 grit.


Next, we used 220 grit sandpaper for the creases, corners, and crevices. This one was $3.97 at Lowe's.


PRIME & PAINT: Prime your dresser (1 coat). We found that a foam roller and foam brushes work best. There are NO brush strokes this way - NO streaking! Hooray! We learned this the hard way. You can find this mini roller/tray set for $3.78 and this foam brush set for $0.97 at Wal-Mart.

 Prime and Paint your dresser (3-4 coats). The number of coats is your personal preference and depends on the dresser. Here's what we used:


Let paint dry 24 hours between each coat. Grade some papers in between. :) Once all of your coats are done, let the paint "cure" (or sit to dry) for 48 hours. ***We still have a white towel underneath our TV right now. We will leave it on for a total of 4 WEEKS to make sure that the weight of the TV does not cause indentations or cause the paint to peel up if lifted.
Choose baskets to insert into the empty drawer spaces, and new, modern handles if desired. VOILA! We bought these baskets at "At Home" for $12.99 each.

We also found some modern handles at a store called Menard's. They were about $4.00 each. If you don't want to spend money on new handles, you can spray paint them the color of your choice. I am particularly fond of bronzy golds or pewter!
We are SO HAPPY with how our DIY project turned out! My husband has worked so hard on this and it has turned out beautifully!!! We LOVE our new TV stand and have already had SO many compliments on it!!! We hope this inspires you, as well!

We are SO HAPPY with how our DIY project turned out! My husband has worked so hard on this and it has turned out beautifully!!! We LOVE our new TV stand and have already had SO many compliments on it!!! We hope this inspires you, as well!

Happy DIYing!!! :)

No comments:
Post a Comment