I am SO excited because yesterday was officially the First Day of Fall! I absolutely LOVE the season of Fall and everything that comes with it. It's time to break out the boots, sweaters, and everything
 Pumpkin Spice! :)
Today, I want to share with you some of the lessons/activities I did with my students during the season of Fall these past few years. Since I do not have my own classroom right now due to my recent move across the states, I will be somewhat limited in what I can share with you. I will do what I can! Thanks for understanding! :)
First and foremost, I want to give a huge shout out to my previous Kindergarten Team - A LOT of these ideas were from you, so THANK YOU, friends! I miss you so much and I will take the ideas I learned while teaching alongside you and share them with new teacher friends!
Beginning during the last week of September, I usually split up my Fall Themes as follows:
Week 1 - Fall/Leaves/Acorns
Week 2 - Scarecrows
Week 3 - Apples
Week 4 - Pumpkins
Week 5 - Skeletons/Spiders
Week 6 - Nocturnal Animals
Our team has done a "Fall Rotation" in the past so that we could all check out different books from the school library and pass them around according to the theme we were on that week. This rotation usually takes us through Sept./Oct.
Here are some of the lessons/activities I have done in the past. I have listed 2 ideas for each theme. I hope you find some of them helpful and fun! :) Enjoy!
FALL/LEAVES/ACORNS
 Sight Word Leaf Hangers

 Sight Word Leaf Hangers
I usually hang these up in front of the classroom window. It feels so festive!
What you Need:
- Di-Cut Leaves in Various Colors 6 per student
- Yarn Pieces Cut
- Scotch Tape
- Markers
Students choose the 6 leaves they want and write sight words they have learned so far. You can modify this for different grade levels! Once they are done writing and have read all of their sight words aloud to you, they tape them onto the yarn piece. Done!

Fall Senses Book
I LOVE incorporating the Five Senses into the season of Fall! This book is SO much fun because the students actually get to experience those Fall Senses they are writing about! Here is my lovely assistant, Chief, displaying the My Fall Senses book for you. Thank you, "Vanna!"
What You Need:
- Cover Pages with Titles
- Pages (5 per student - one for each sense)
- Paper for face/hands
- Markers
- Yarn for hair
- Glue stick
- Scissors
- Materials for each page (will list individually)
- Staples for once all pages are done - Make into a book for each student!
Here are the parts of the book:
Cover (closer look):
Cover (closer look):

Page 1 - "See": Markers; Red, Yellow, and Orange Paint using Q-Tips

Page 2 - "Hear": Markers; Leaves collected from playground; Glue

Page 3 - "Smell": Template for mug; Construction paper; Markers; Hot Cocoa sprinkled on top of glue; Scissors

Page 4 - "Taste": Tin foil cut into pie plate shape; Markers; Orange paint mixed with Salt to give it texture; Paintbrush

Page 5 - "Touch": Acorn template; Brown construction paper; Glue; Sand sprinkled on glue

SCARECROWS

Learning about Scarecrows is so much fun! :) This activity is great for fine motor skills, as well, because it has a handful of small pieces that students have to cut out. I got this scarecrow idea and template from the wonderful Miss Kindergarten! She is AMAZING!!! All of the templates and directions are in her TPT store. The kids loved making these and they looked so cute displayed on the bulletin board!
Scarecrow Family Project
This is a great way to get parents and families involved with students' schoolwork! They can decorate their scarecrow any way that they like. Then, they work together as a family to write a story about their scarecrow. These always turn out so cute and the students love sharing their stories with their classmates!


APPLES
 Apple Sun-Catchers
This is a fun activity for young students to do! They just stick the tissue paper squares onto the contact paper, and Voila!
What You Need:
- Teacher-Prepared Apples Get Red, Green, and Yellow construction paper. Use a handmade template of your choice to trace your apple. Cut out the center of each apple.
- Contact Paper Unroll a large amount of contact paper on a large surface area, such as the floor, by peeling the white part back. The sticky surface should be facing the ceiling. Lay down 5-7 apples. Then, REPLACE/LAY DOWN the white part of the contact paper sheet. All of the apples should be in between the clear, sticky part and the white overlay. Cut out. Keep white part attached until ready to use.
- Tissue Paper Squares I let my students choose the colors they want.

Take note of how the contact paper should appear once the apples are cut out. This does take practice! :) Doing multiple at one time on a long sheet of contact paper works best!


Apple Labeling
This activity is a great way to assess students in a lot of different areas - decoding words and the ability to match them to the correct part to "label" the apple, fine motor skills (tearing paper and gluing), following multiple-step directions, etc. We did this activity after a previous activity in which each student brought in an apple from home and they described it in writing using their 5 Senses. I also cut an apple in half so they could see the "star" in the middle of the apple.
What You Need:
What You Need:

- Paper Plates Sides need to be cut off - Those will be the "leaves"
- Construction Paper Red and Green to tear; Brown for stem; Black for seeds (or you could even have them glue on real apple seeds!)
- Words Printed for students or you could have them write the words
- Glue
- Scissors
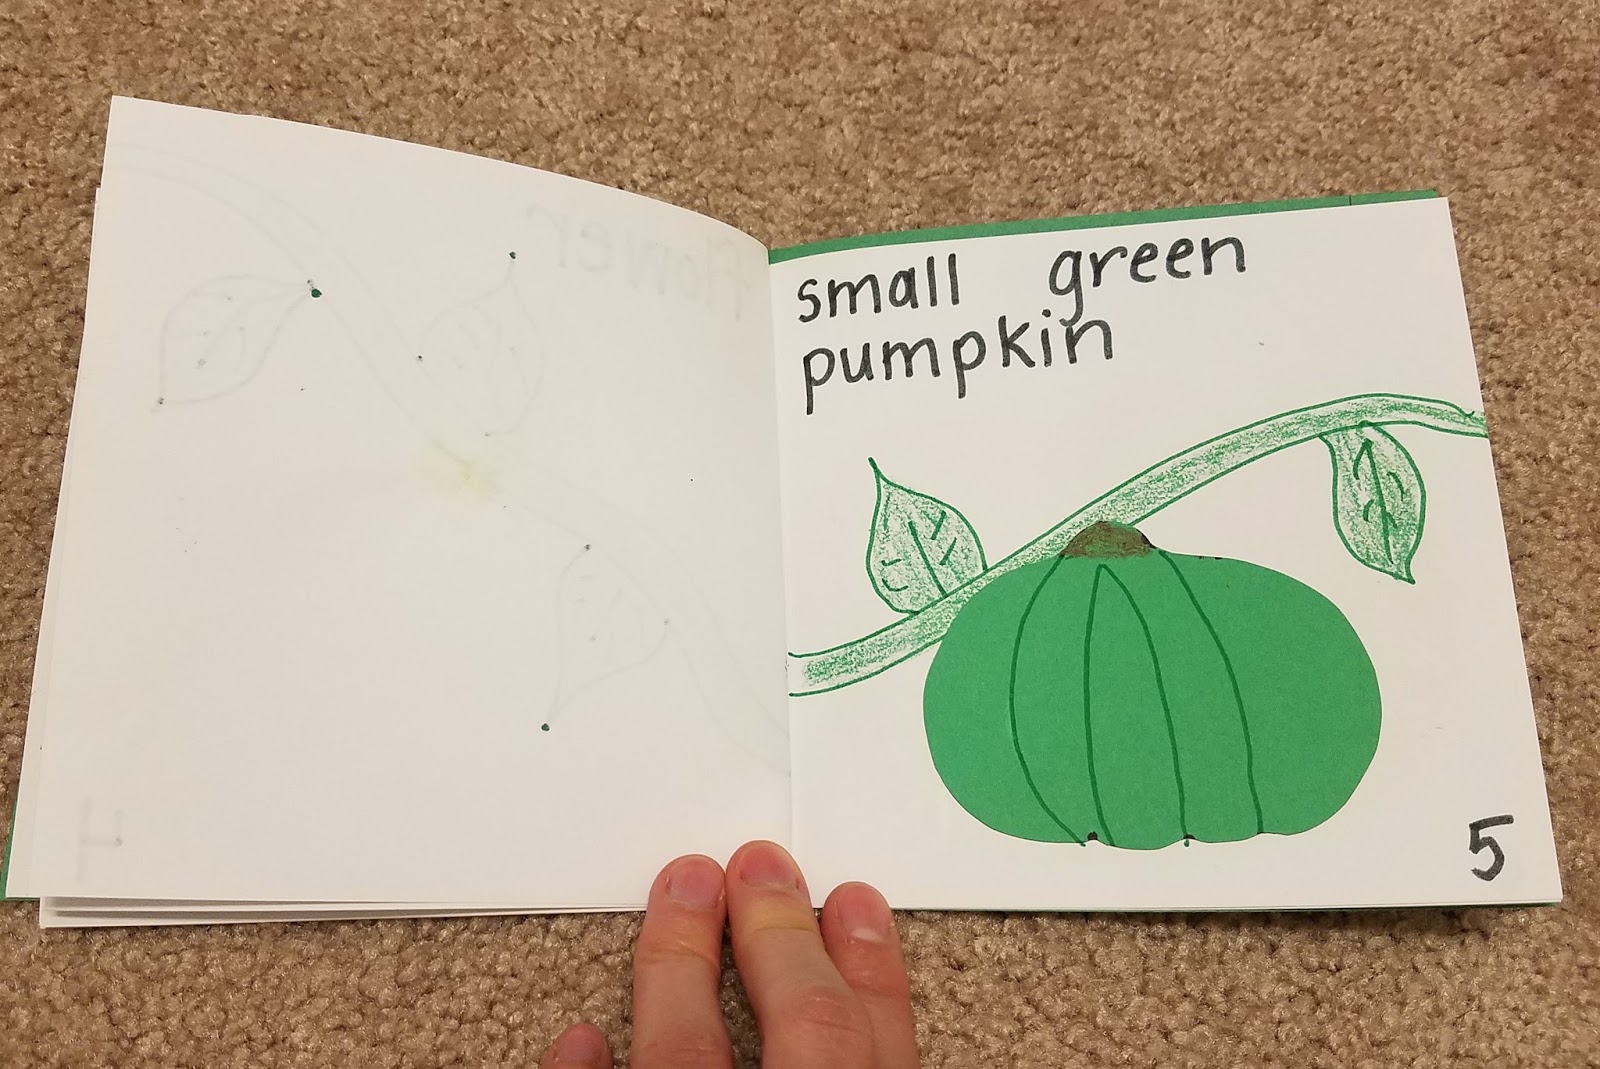
PUMPKINS

This is a great way to see if students understand the life cycle of a pumpkin. I usually pair this with the book "From Seed To Pumpkin" by Wendy Pfeffer. You can find this book HERE.
What You Need:
- Green and White Construction Paper Booklets Folded and Stapled
- Orange Pumpkin Di-Cuts 2 per child
- Small Green Pumpkins 1 per child
- Markers
- Crayons
- Glue
- Pumpkin Seeds
- Green and Yellow Tissue Paper Pieces
1.

2.

3.

4.

5.
6.

Pumpkin Bingo
I usually use this during my Fall Party, where I have a parent volunteer call out letters or sounds. However, you could use it during your week studying Pumpkins if you wanted to! I just made my own bingo boards from orange construction paper and typed up some charts in a Word document. I printed them and glued them onto my pumpkins. I had a parent volunteer use Letter Cards (just cards with letters of the alphabet on them) to call out letters or sounds. Students used candy corn as bingo chips! Can you say, "Fun?!" :)

SKELETONS/SPIDERS
Q-Tip Skeleton
What You Need:
- Black Construction Paper
- Q-Tips (whole & halves)
- Glue
- White Construction Paper for Skull
- Black Markers
- Writing Paper/Pencil
- Book: "Skeleton Hiccups"
Spider Hat with Sight Words
 Most young children get a kick out of wearing any kind of hat they can make! They especially loved wearing these spider hats around school! :) Glue the orange circles to the sentence strip. Glue face on top. Write sight words on legs. Then fold the eight spider legs back and forth repeatedly to give them an "accordion" look. Glue onto hat and let dry.
What You Need:
- Sentence Strips OR Black Construction Paper Strips
- Black Construction Paper "Legs" - 8 per student
- Black Construction Paper Di-Cut Smiley Faces
- Orange Construction Paper - circles go BEHIND faces
- White Crayons
- Glue
NOCTURNAL ANIMALS
"-at" Word Family BatsYou can modify this activity in so many ways! I have done it several different ways, one of which included having the kids glue on pictures that show "-at" family words (cat, hat, rat, mat, etc.). I have even done a writing activity glued onto the inside of the bat and we have hung them upside down on a bulletin board. You can modify it any way you like!

What You Need:
- Black and Brown Bats
- "-at" Word Family pages (The yellow ones are stapled and flip up like a flip book. Students trace the yellow letter with pencil.)
- Pictures of "-at" family words if you so desire/Crayons
- Markers
- Pencils
Owl Number Words
These task cards are AWESOME! There are several variations so that you can set them up at centers and/or differentiate instruction. They are from Jill Bell, but I cannot for the life of me find the link to give her proper credit! If you find her link, please comment below! :) Thank you!

Please leave a comment telling me which activity was your favorite! Also, please feel free to share your own ideas so we can brainstorm and learn from one another. Thanks and Happy Teaching!!! :)